

Using the Playground
- Go to Prompts in the navigation.
- Click the add prompt button at the top right. Phoenix opens the Playground.
Compose a prompt
Before you run the prompt, make sure that you set an API key for your LLM provider.- Enter sample inputs for your prompt variables on the right.
- Run your prompt against a model.
Save the prompt
- Click the save button in the header of the prompt on the right.
- Name the prompt with alphanumeric characters and no spaces (for example, `my-first-prompt`).
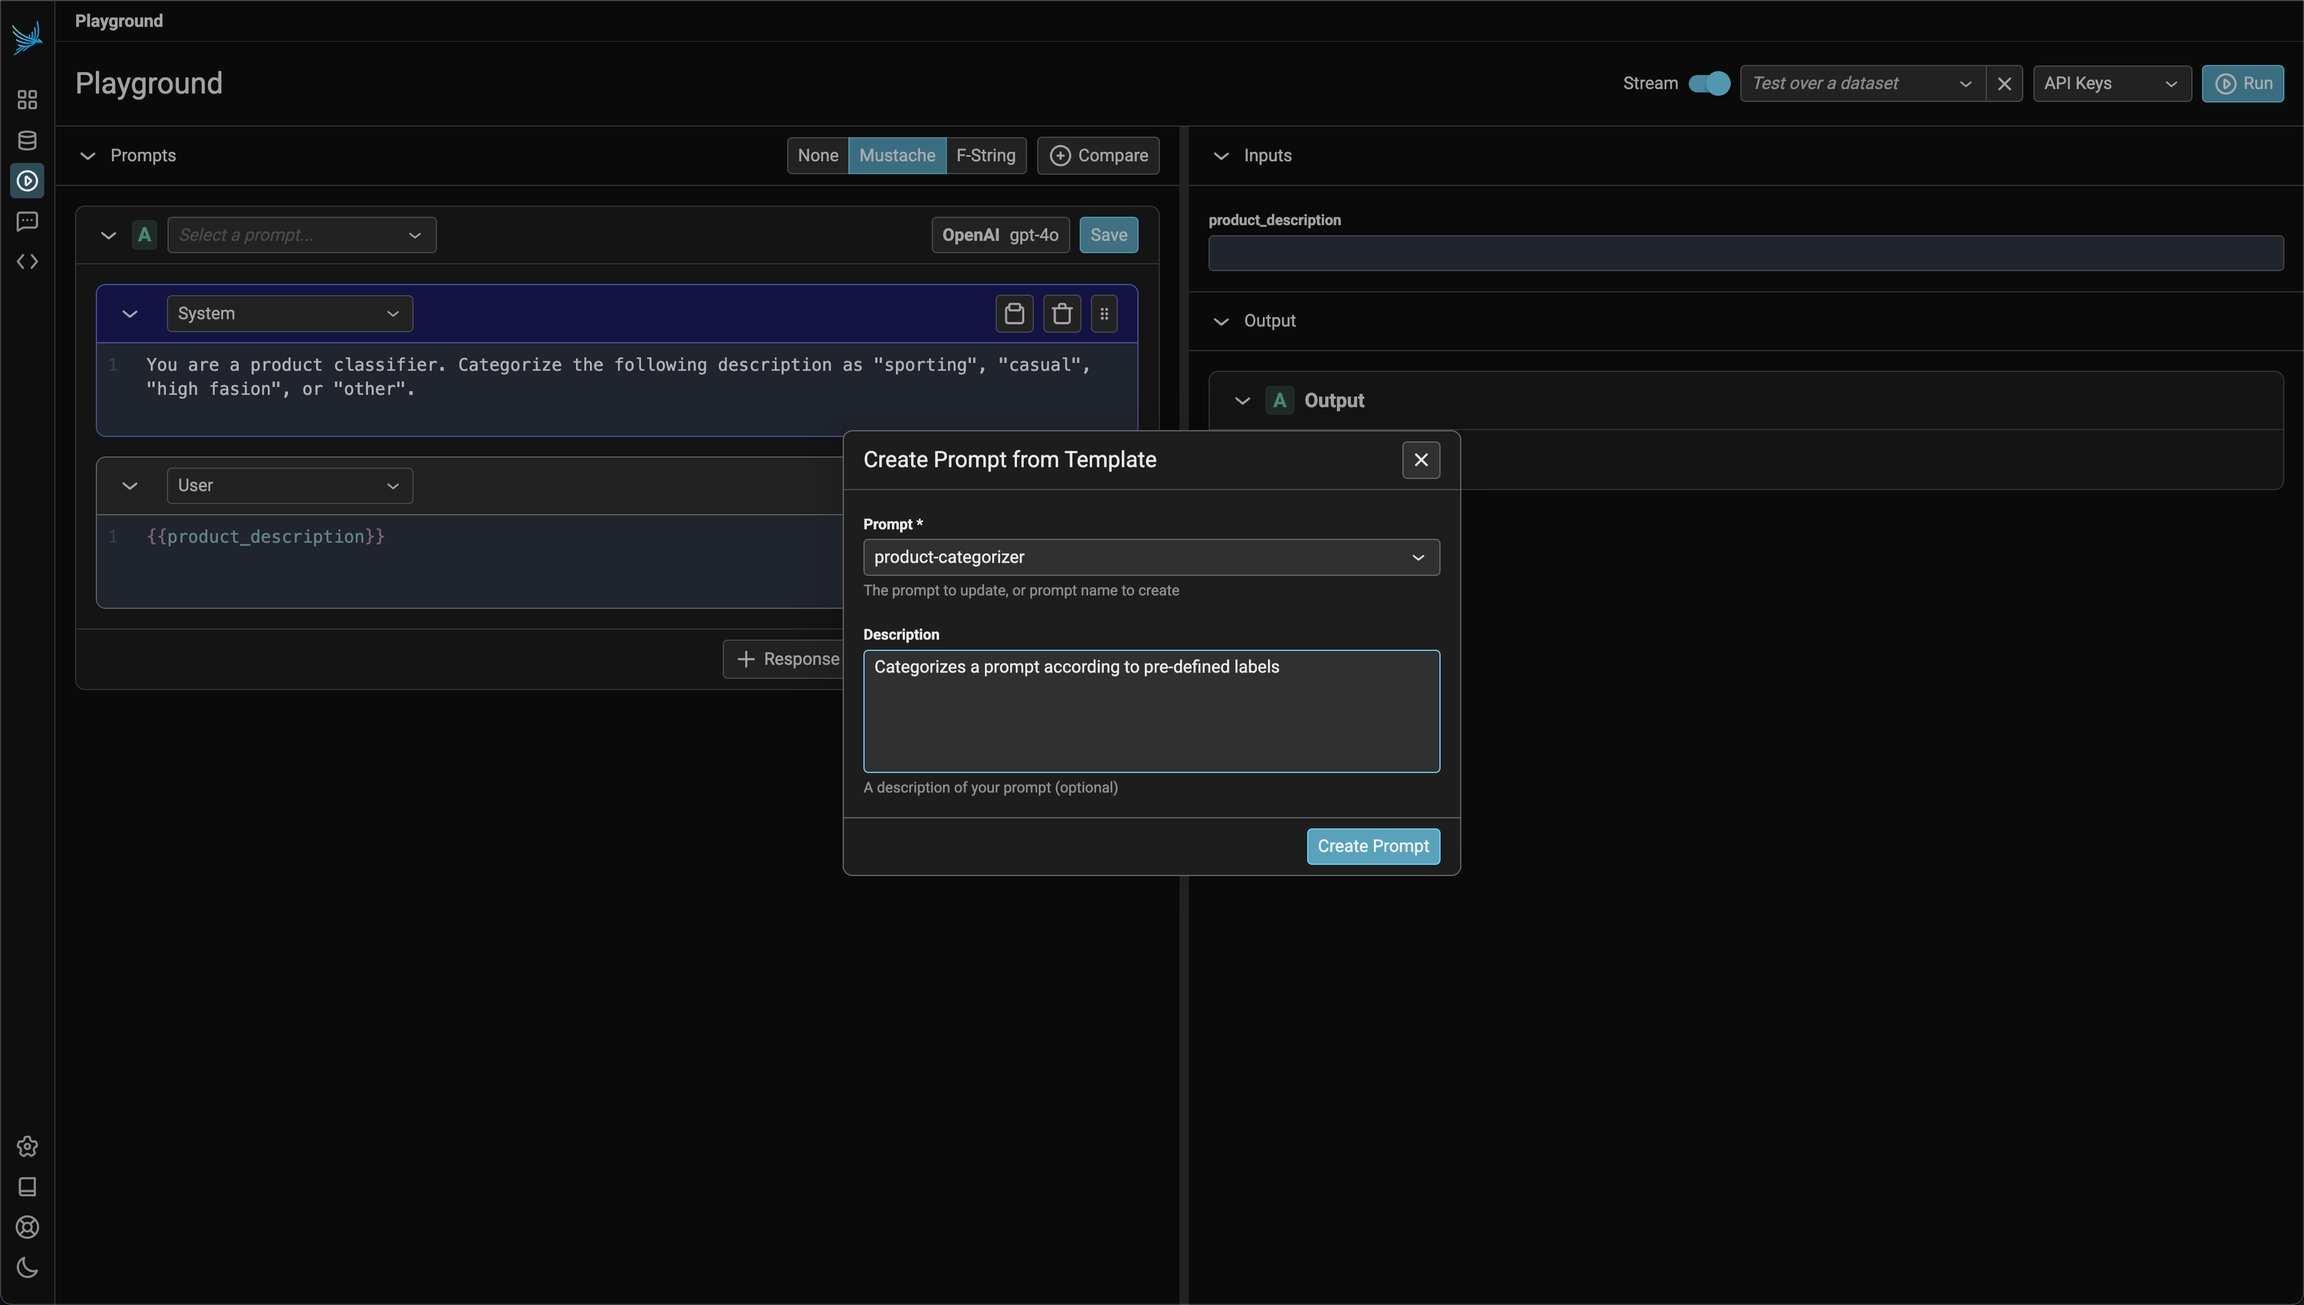
Once you are satisfied with your prompt in the playground, you can name it and save it
View your prompts
To view and search your prompts, go to Prompts in the UI. To load a prompt back into the Playground, click open in playground. You can do this at any time.
You can quickly load in the latest version of a prompt into the playground
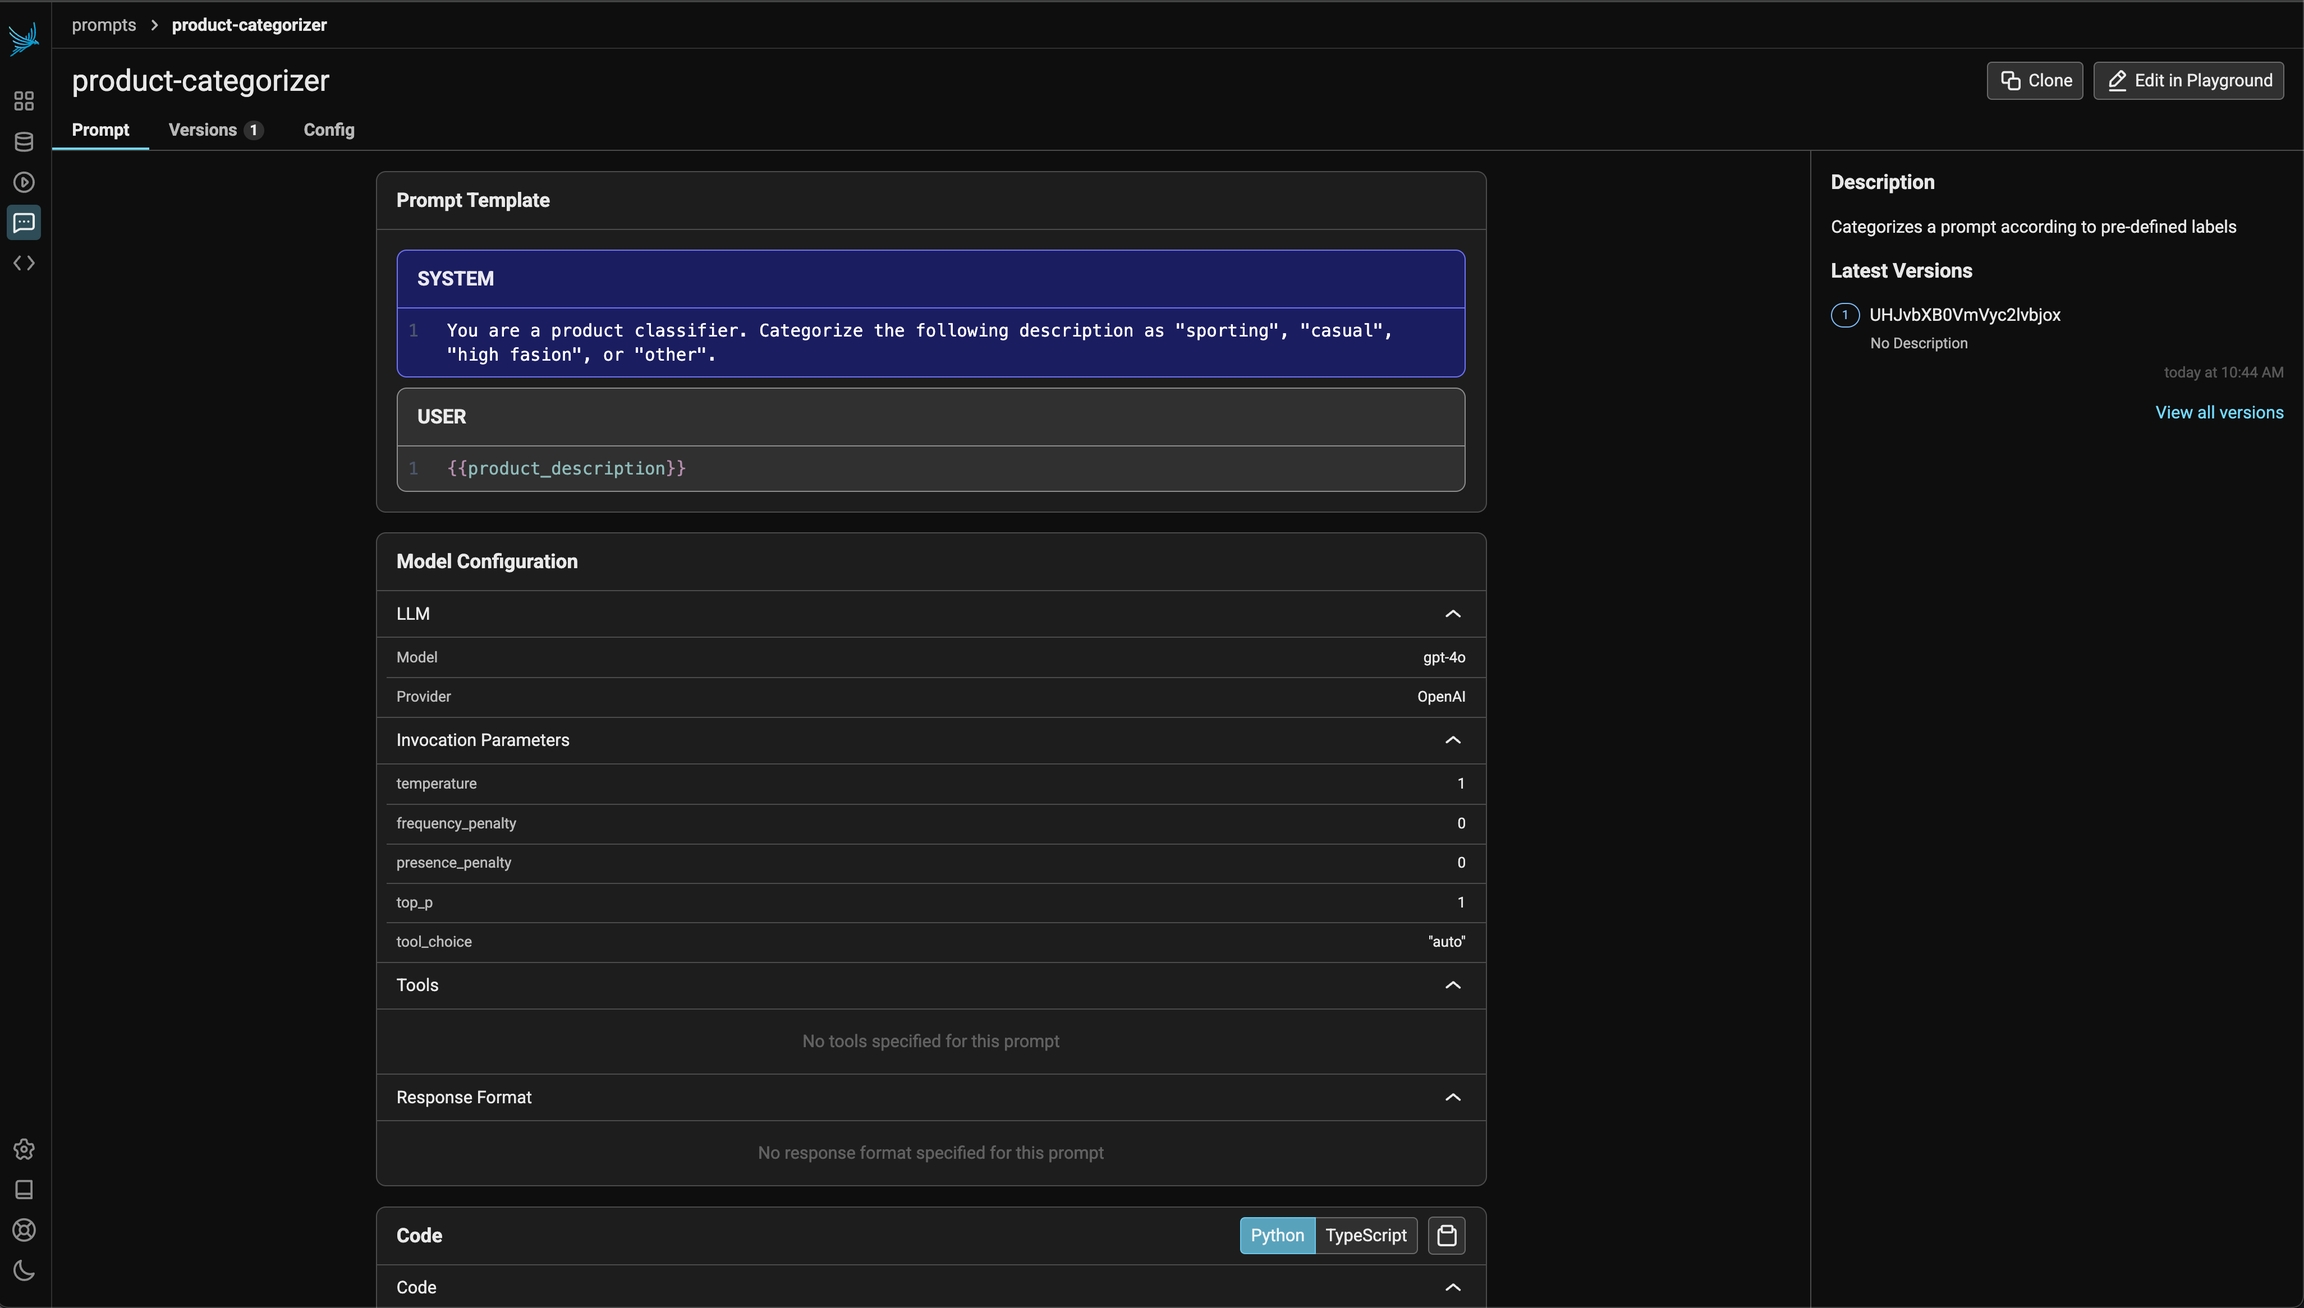
The details of a prompt shows everything that is saved about a prompt
Making edits to a prompt
Use the Playground to edit a prompt. Select a method for the size of the change:- For a small change, save a new prompt version.
- For a large change, clone the prompt.
Editing a prompt in the playground
- In the prompt details view, click edit in Playground at the top right.
- Make your changes.
- Click save.
- Enter a description of your changes.
Iterate on prompts in the playground and save when you are happy with the prompt
Cloning a prompt
Clone a prompt to change it without changes to the original version. Cloning is similar to forking a repository in Git. The clone keeps the history of the main prompt safe, so you can reverse your edits.- Clone the prompt.
- Make and review your changes in the clone.
- Keep the clone as a separate prompt, or merge your changes back into the main prompt.
- To merge, load the cloned prompt in the Playground and save it as the main prompt.
Adding labels and metadata
🚧 Prompt labels and metadata are under construction.Using the Phoenix Client
Use the Phoenix client to create and get prompts in code. Use this method to sync prompts with the Phoenix server from a program. Before you start, install the applicable phoenix-client.The Python and TypeScript phoenix-client packages are in early development. Some features are not available yet. To request an enhancement, open an issue: https://github.com/Arize-ai/phoenix/issues
Compose a Prompt
- Python
- TypeScript
This example prompt summarizes articles as bullet points. Use the Phoenix client to store the prompt in the Phoenix server. The prompt name is an identifier. It can contain lowercase alphanumeric characters, hyphens, and underscores, and no spaces.To get a stored prompt, use its name. By default, the client gets the latest version. To get a specific version, use a version ID or a tag.To get a version that has a tag, for example “production”, add the tag: